Showing posts with label Mini Albums. Show all posts

Friday, May 4, 2018

Spool Mini Album

Hi everyone!
Long time no post, huh?
Yes, unfortunately it's been a few years since I've been able to post anything on this blog, life definitely has gone on and taken over, but if you follow me on Instagram, you've seen a bit of what I've been up to all this time. If you follow me on my Youtube channel, you definitely know everything about what my post is today. If you don't follow me on my other social media accounts, I suggest you do, so you int miss out (check the directs link on the sidebar of this site).

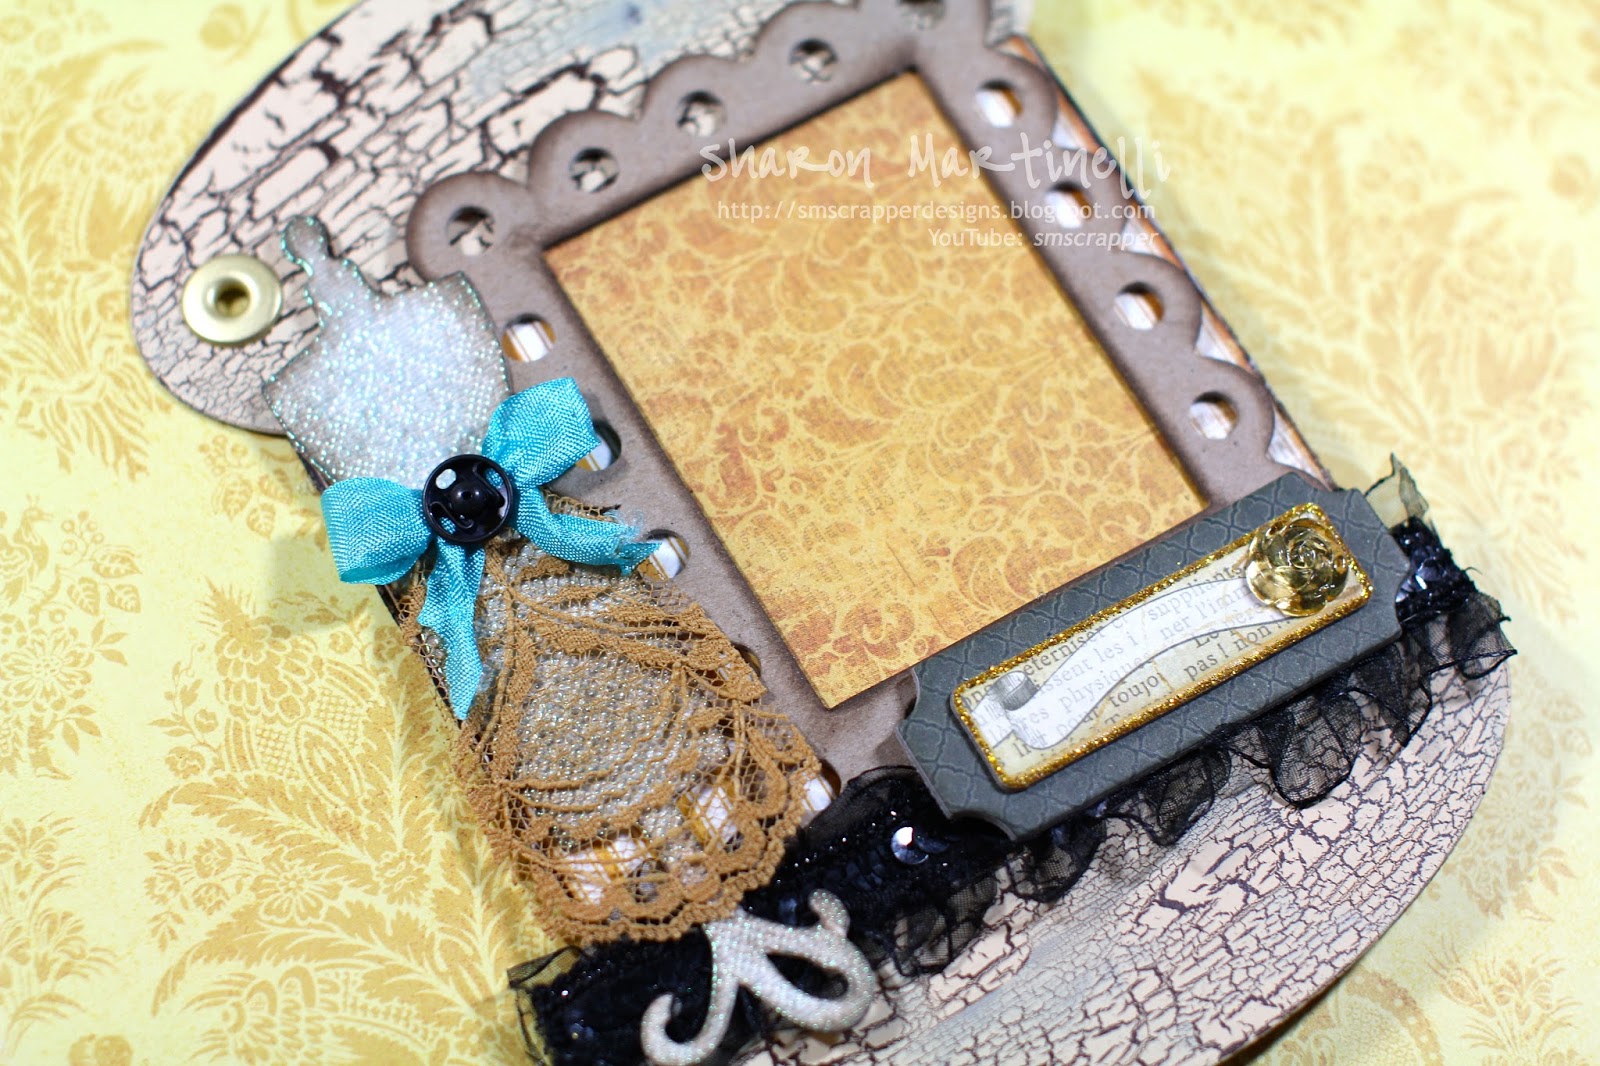
I've been posting videos since late February again, and I've walked you through how I created the mini album I'm about to show you. It's been one of the most labor intensive editing jobs I've done, since the making of this album, due to my responsibilities, and lack of free time, took place within many different days. It was not all filmed at once, not in one day (I think you can see the variations of my nail polish which give it away hehehe).

For the first time, I decided to record the whole process of making a mini album. I've had multiple requests throughout the years to do so, and I finally I did it. Took a while to edit, but it's finally finished. I hope you enjoyed the process if you watched all of the videos (if you didn't you can click HERE).
Prepare yourselves for a ton of pictures! Hope you liked them. If you have any questions, you can always leave a comment, or contact me directly at smscrapper@gmail.com.
Thanks for stopping by!


Monday, October 29, 2012

A Shabby Album

It's been a long time coming, and I finally got the chance to upload the pictures of this project to share with you! I worked on and off on this album for quite a while, and even though it's a simple album, for some reason it took me forever to get motivated to finish it.
I used the Portrait Accucut Die for the base of the album, which is chipboard, and which I cut in half to make the portrait shape into actual pages for the album. Since I'm on a "paper diet" (which I broke a few days ago, but I'm currently back on it lol), I told myself I needed to start using all the gorgeous designer paper that I keep piling up. What I'm about to say is kind of silly, but honestly, some collections I just have a hard time cutting into lol. For instance, I've been wanting to do some stuff with Graphic45's last year's springs collection, yet every time I think I might sit down and start the project, I put everything away because everything is so beautiful I don't want to cut it lol! Isn't that just CRAZY?! Seems pretty crazy to me, but little by little I'm pushing myself to use all my gorgeous paper lol. One that's particularly hard to get into, is my all time favorite Lost and Found by My Mind's Eye, the Sunshine Collection. Ugh! I LOVE that entire line, but that particular collection just drove me crazy and I bought everything of it, both the 6 by 6 and 12 by 12 papers too. I have stuff in mind for them...now it's only a matter of cutting them up and starting already lol.

Anyways, back to this album. I used one of my hoarded collections by The Girls Paperie. So sad they closed down, because their designs were pretty neat. I also used some of my leftover paper from K & Co.'s Watercolor Bouquet Collection, because some of the colors went well with The Girls Paperie stuff. I made a detailed video of this project which you can watch at the end of this post if you are interested in seeing all the details, but here are a few pictures so you can get a glimpse of some of what can be found inside.


Here's the video for you:
The goal with this album was to have a place to hold a bunch of pictures of my Emily's second year of life. I can't believe how fast time flies, and sure enough she'll be turning three pretty soon! I hope you enjoyed this project, and stay tuned, because I'm determined to get into my paper stash, and I think The Sunshine Collection by My Minds Eye is my next target!
Hope you are having a good week, and if your town is on Hurricaine Sandy's Path, know that you are in my prayers. It wasn't even a direct hit in my area, and still the beaches around here have been completely wiped out... stores are closed, and the storm's consequences aren't done yet with this area. I can't imagine everyone that's getting directly hit with that awful storm. Be safe and take care!

Thursday, July 26, 2012

Beach Day Mini Album

Hello there!
Today I wanted to share with you a mini album I made using the July Design kit from The Paper Niche. There were so many yummy Authentique papers in this kit and I just knew they needed to be converted into a mini album.
I constructed this mini album from scratch, like I usually do, but this time I DID NOT use any chipboard to make it. I only used really nice card stock, and it's really sturdy and strong, because with paper layering and the pocket pages I created on the inside.
It's a relatively simple album, full of space for pictures. To watch all the details of the album, as well as a tutorial on the pocket pages I made, just watch the video below. Thanks for stopping by today!

Tuesday, May 29, 2012

Super Cute Together Mini Album

Hi everyone! I hope you had a great Labor Day weekend.
Today I wanted to share with you a mini album I created from scratch using the Paper Niche's May Design Kit. I used thin weight black chipboard to make this whole album base. I also included an acrylic page in the album, which is an addition I like to include in many of the albums I create.
Using the DIY Thicker letters included in the kit, I incorporated some micro-beads to my project. I haven't used micro beads in ages, and thought the Thickers would look really cool with them. Here's a close up of how they ended up looking.
Here are the different page layout of the entire album.


In the next picture, one of the interactive arts of the album, envelope pocket which I closed using some velcro.
Another interactive part of the book...


If you'd like to see how all the parts open, more details and close ups of all the accents, please watch the video below. I hope you enjoy!

Friday, May 4, 2012

Follow Your Heart Tag Mini Album

Hello everyone! Today I'm sharing with you a project featuring Lindy's Stamp Gang products. I love how this shabby little book came out, and it was inspired by THIS tag I made for the Lindy's Stamp Gang booth at Winter CHA.
I used several embossing powders and Lindy's Stamp Gang(LSG) Sprays throughout out the album. I cut out the birds, crown and birdcage out of chipboard with Tim Holtz alterations dies. On the crown I used Lindy's Stamp Gang Embossing Powder in the color Hibiscus Rose Orange, and on the birdcage I used Weeping Willow Green Gold, also from LSG. I sprayed the entire album cover as well as the birds, and all the tag pages with my Glitz Spritz in Scintilating Silver.
To color the flower on top of the raffia bow, I used the Starburst Stain colors in Alpine Ice Rose and the Icy Primrose Gold. I used those same two colors to color the trim you see on the binding of the album, and in some pages of the inside pages of the album. Underneath the bow, I added some lace from my local scrapbook store, some bling sprays, and some Melissa Frances crystals.

There is an acrylic tag page, which I accented with some lace and a chipboad piece I embossed using the Weeping Willow Green Gold Embosing Powder. You can watch more details on THIS video I made.


Really shabby, and simple album. I had a great time creating it. Hope you enjoyed!

Monday, March 12, 2012

Birdhouse Box and Mini Album

Hi everyone! Hope you had a great weekend!
Today I wanted to share a box and mini album set I made for the Lindy's Stamp Gang booth at CHA this winter. I've never done a box for a mini album before, but this was perfect for the spring theme we had to work with. This first picture is what I turned the box into, 
but initially, the box looked something very similar to this one on this next picture....I bought it at one of my local TJ Maxx Stores, and it was made to hold stationary. As soon as I saw it, I knew I wanted to do something with it.
I bought it, and turned it into what you saw, and made a small mini album that coordinates with it, to go right inside  it.
I made a video giving more details on each angle of both the box, and mini album. You can watch that HERE.  As you can see, I did the crackle technique on the box, using brown as my background, and ivory paint as my top color. I then sprayed the entire box with my Glitz Spritz in the color Scintillating Silver.
On the bottom I used some cardstock which I punched with one of my Martha Stewart border punches, and then embossed using Lindy's Stamp Gang Embossing Power in the color Byzantine Bronze. on top of the embossed paper lace I created, I added some cream colored crochet lace. Throughout the box I added butterfly accents, which I punched out of cardstock using some of my butterfly punches by Martha Stewart, and a Stampin up Bigz die. Some of the butterflies I sprayed with my Starburst Stain in the color A bit o'bubbly and then embossed with  Dandelion Yellow embossing powder for texture. Other butterflies I sprayed with Wild Honey Suckle Coral and Glory of the Seas Gold Starburst Stain, and then embossed with Hibiscus Rose Orange embossing powder.


 I added small bling pieces of bling to the centers of the butterflies, and more of the cream colored crochet lace on the roof of the box.
The accents on the side of the box are fabric dimensional accents from the Colorbok Flea Market Collection, which is the one I used to create the mini album that coordinates with the box.
The mulberry and canvas flowers you see in the front ot the box, and of the mini album where colored using Starburst Stains in the colors Tiffany's Blue and Cotton Candy Pink.
As you can see in the next pictures I continued adding butterfies, the flowers and the fabric accents to the mini album. I did that to tie it in together to the box.

I sprayed all the pages in the mini album, as well as all the accents on the cover of the mini with my Glitz Spritz in the color Scintillating Silver.
On the back of the box I added a big carstock sticker from the paper collection I used and added some cream lace in the back of it, just to accent the piece. 
I love how this project turned out, and I hope you did too. Thanks for stopping by today. More coming up next!
Related Posts Plugin for WordPress, Blogger...